Monday, July 23, 2012

Battle of Possneck Day 2 – Move 8


1500-1600  15th August 1813

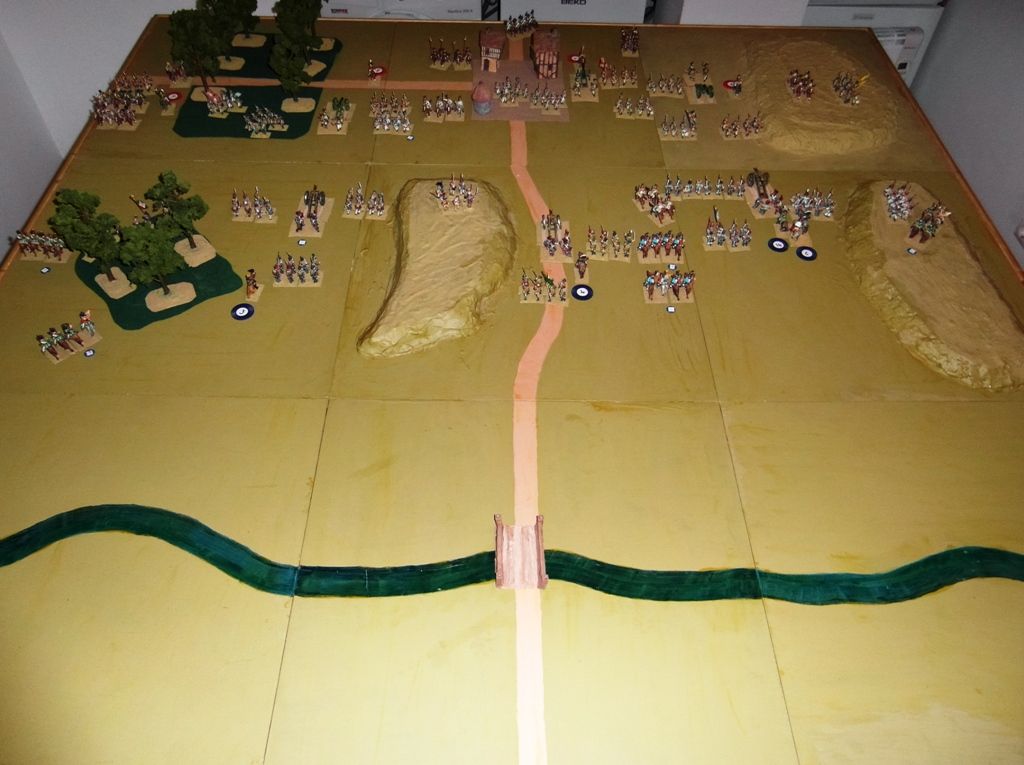
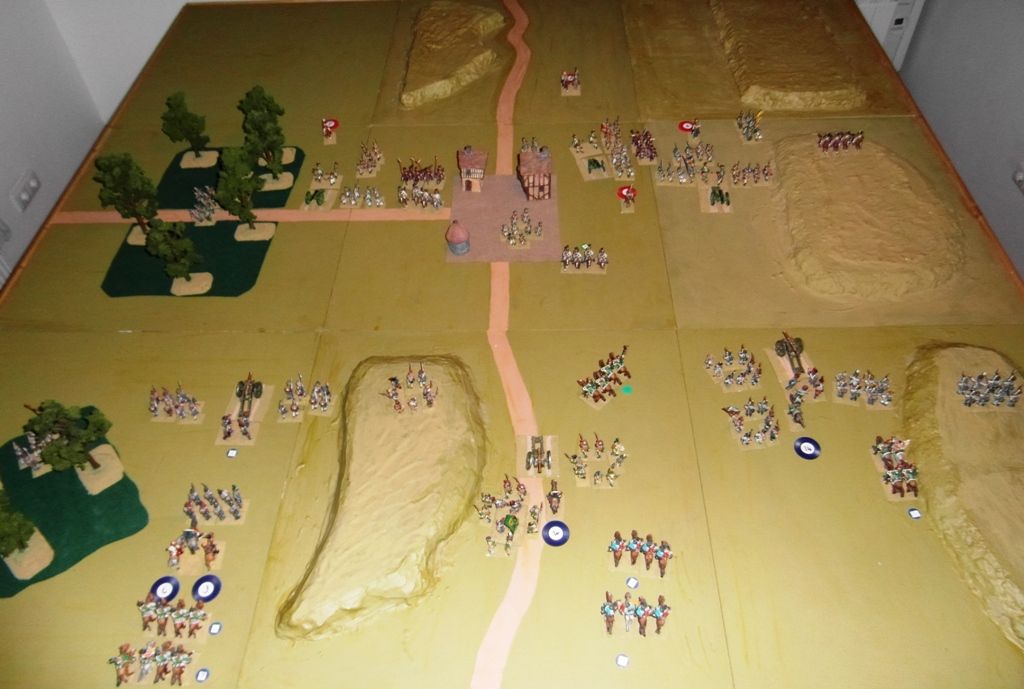
Table at start of Move 8

The battle is now entering the critical phase
Both corps are within close combat range 

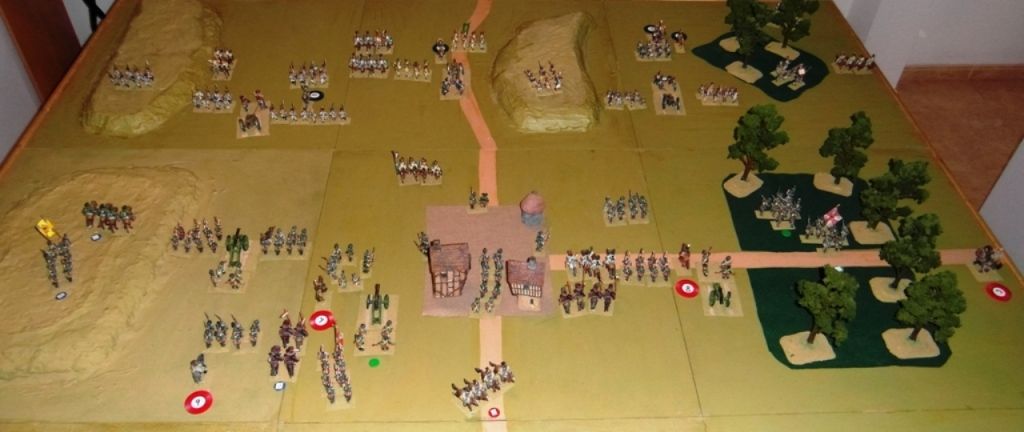
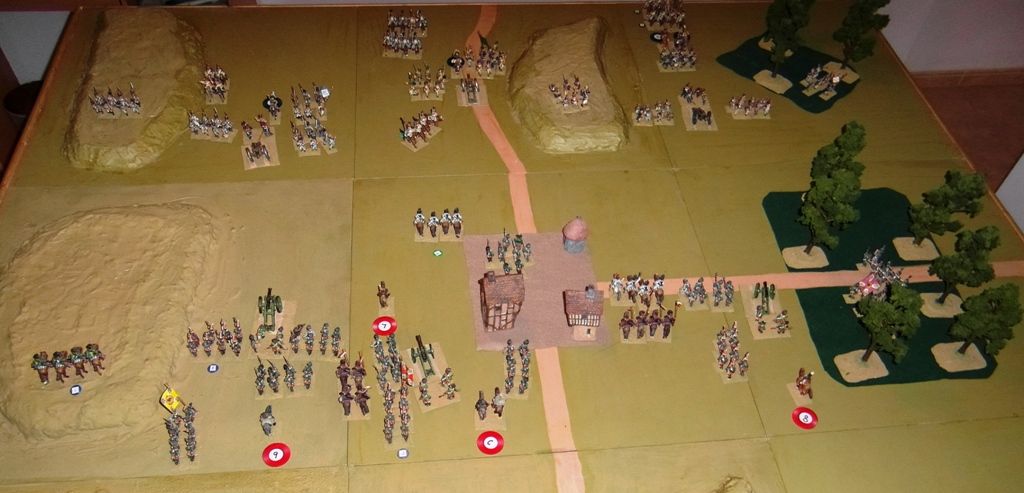
 Russian corps at the end of Move 8

3rd Russian Corps
Wintzingerode moves to change division orders from Engage to Attack

Rudzewitsch (left) now on Attack orders
His grenadier regiment charge home on the French gunners and cut them down
Major setback on the hills to his left
His artillery is charged by the French dragoons and cut down
Supporting infantry and cavalry both shaken
 
Woroncow (centre left) is still on Engage orders
His artillery have moved forward to close range, and cause damage to the French infantry
2nd infantry exchange volley fire with 5th Westphalians, both lose 10% but neither give way

Melnikow (centre right) orders changed from Engage to Attack
He orders his shaken infantry to withdraw to make room for the cavalry reserve
4th cuirassiers move forward and prepare to charge French infantry

Galitzin (right)  still on Engage orders
His cavalry receive ineffective skirmish fire from the woods as they push towards the bridge
His two leading infantry regiments advance to woods and skirmish with French infantry
French receive 10% casualties and retire from edge of woods shaken
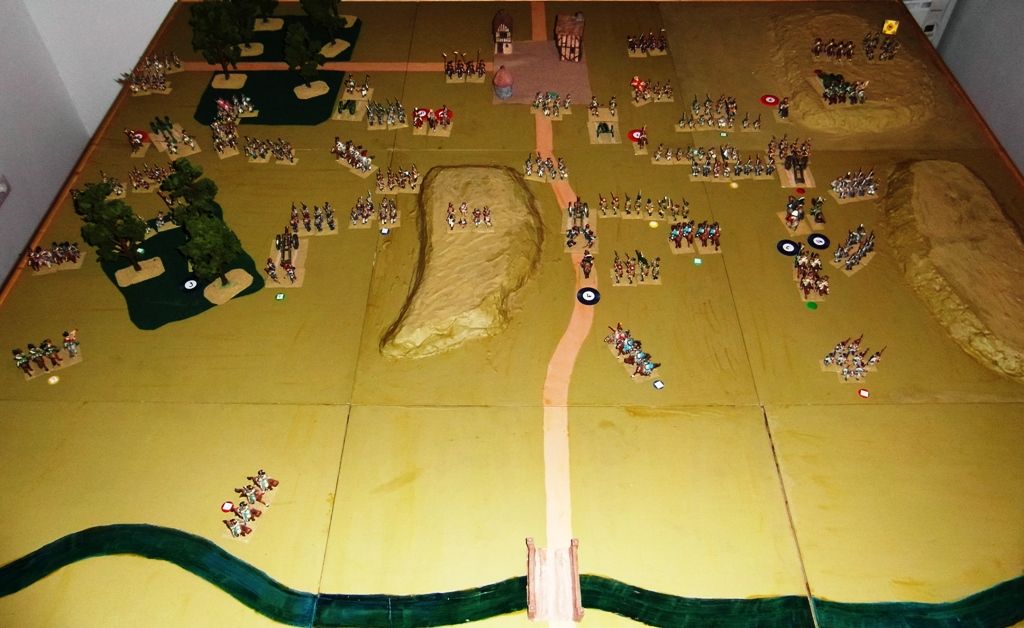
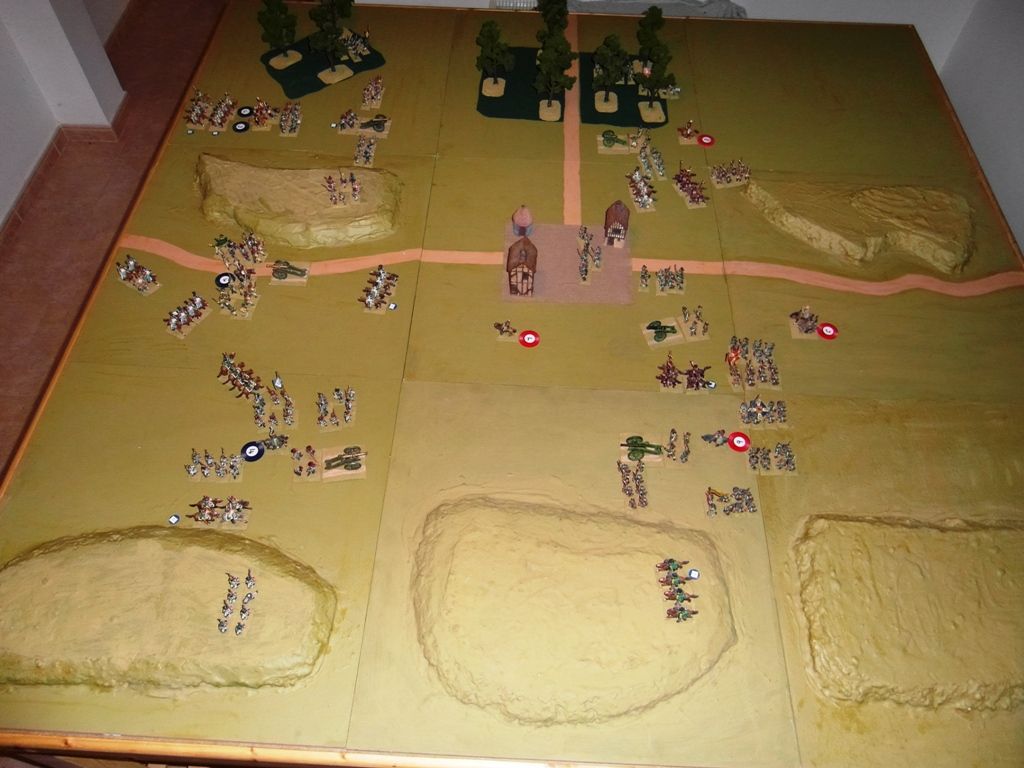
 French corps at end of Move 8

2nd French Corps
Victor orders his divisions to attempt a fighting withdrawal to the river
 
Dubreton (left) orders his artillery, and his isolated infantry on the hill, to fall back to the bridge
The remainder of his infantry continue to skirmish, but are losing the combat
In desperation he orders 6th chasseurs (with 20% casualties) to charge the Russian dragoons
The chasseurs fight well, but are forced to withdraw Shaken
There are now no formed cavalry to prevent the Russians taking the bridge

Vial (centre) has received orders to withdraw to the river and hold the bridge
He is under attack, and can only send 16th hussars to hold the bridge
His artillery fire one last round on the Russians and then limber to retreat
The Russians receive casualties but continue to advance
One shaken infantry regiment, and the disordered 11th hussars, are left to cover the retreat

Maison (right) is making a determined stand
7th dragoons test for opportunity charge on Russian artillery as they attempt to deploy on opposite hill
Dragoons charge, Russians fail test to react, gunners are cut down
Supporting Russian infantry and cavalry both fail morale test and are Shaken
His gunners are overrun and cut down by Russian grenadier regiment
5th infantry are within 4”, lose their morale test and are shaken
Despite his success with 7th dragoons his position is now desperate
He has lost his artillery and one of his infantry regiments in rout, a second is shaken

Game Notes

Both corps are now losing serious casualties, resulting in loss of morale
Up to one third of each division is cut down, in rout, shaken or disordered
No CPs are allowed for these regiments
Divisional commanders must decide where best to use the reduced CPs

The combat options when on Engage or Attack are very different
Engage allows infantry to skirmish or volley, but not to melee
Attack orders allow infantry to charge and melee, both infantry and gunners
On Attack orders combat tends to be much more decisive

Rule 3 covers Command Points (CP)
Rule 4 covers divisional orders

Wargame rules can be found at

Sunday, July 22, 2012

Battle of Possneck Day 2 – Move 7


1400-1500  15th August 1813

Table at start of Move 7

6th  Russian division (top) are advancing beyond the woods
7th and 8th Russian divisions (centre) are approaching the French
9th Russian division (bottom) are already skirmishing with the French artillery

  Russian corps at the end of Move 7

3rd Russian Corps
Wintzingerode urges his corps commanders to press home their attack
He is confident of victory and even the destruction of 2nd French corps


Rudzewitsch (left) continues his skirmish combat with the Westphalian gunners
His infantry advance within volley range and force the enemy to retire shaken with 20% casualties
He orders his artillery, which is screened by his infantry, to move onto the hill to his left

Woroncow (centre left) send his left hand infantry regiment to join the skirmish fight
The remainder of his division continue to advance

Melnikow (centre right) orders his leading infantry regiments to skirmish with the French infantry
They win the initial exchange, disorder the enemy and inflict 10% casualties on each regiment

Galitzin (right)  orders his hussar regiment to charge the nearest French infantry
They have been disordered in the skirmish fight, and fail their morale to react or form square
The hussars cut them down and the regiment is wiped out
The nearby gunners and infantry in the woods are both shaken by seeing them cut down
The remainder of 6th division advance towards the river

 French corps at end of Move 7

2nd French Corps
The French have suffered badly during this move
Their artillery continue to be ineffective
They have lost another infantry regiment to enemy cavalry

Dubreton (left) having lost the initial skirmish combat he orders his infantry forward
They win the volley fight, and one Russian regiment retires shaken and with 20% casualties
Then Russian hussars charge the left hand regiment, who are disordered by the combat
The French infantry fail their morale to form square, and are cut down
The regiment in the woods, and the gunners, are both within 4” and must test morale
Both lose and are shaken

Vial (centre) holds the centre.
His artillery cause 10% casualties on the nearest Russian infantry
But they pass their morale test and continue to advance.
11th hussars are shaken by the infantry rout on their right

Maison (right) moves his reserve regiment to replace the shaken 6th infantry
Despite this 6th regiment fail their morale test and rout
They rout into 3rd dragoons who fail their morale test and become shaken
11th hussars (4th division) are within 4” and also have to test their morale, fail and are shaken
The remainder of the regiments within 4” of the rout all pass their morale test

Game Notes
The skirmish combat has now spread along the whole table
Regiments within 4”, but less than 2”, can skirmish.  
They require a total of 6 to hit

However if they advance  within 2” they can volley fire
Both sides fire at the same time, and the result is likely to be more decisive.

After skirmish or volley fire a regiment is disordered
One such regiment charged by nearby enemy cavalry has been cut down.

It is very unlikely that 2nd French corps will survive this battle
Even if they hold out until night, they must still secure the bridge to retreat
The loss of the cavalry melee on their far left has left the bridge unguarded

6th Russian division has now only to reach the bridge to cut the French retreat

Rule 11 covers skirmish combat
Rule 12 covers musket firefight combat
Rule 15 covers cavalry v infantry combat

Wargame rules can be found at
Friday, July 20, 2012

Battle of Possneck Day 2 – Move 6


1300-1400  15th August 1813

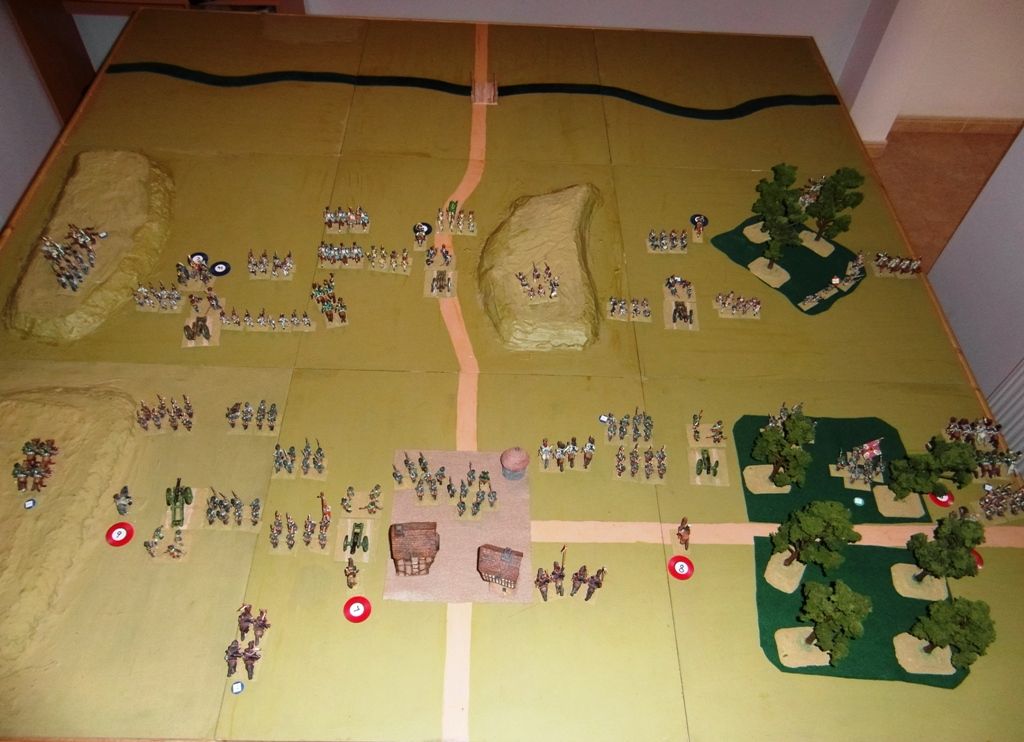
Table at start of Move 6

9th Russian division is now too close for 14th Westphalian division to retire (nearest camera)
4th French division (in the centre) could retire, but would leave 14th division open to a flank attack
3rd French division (top) is about to be attacked by both 6th and 8th Russian divisions.

French corps at end of Move 6

2nd French Corps
Victor has ordered 3rd division to retire towards the river
4th and 14th divisions remain on hold orders

Dubreton (left) ordered 12th chasseurs to attack the leading Russian dragoon regiment
The chasseurs lost the melee, suffered 10% casualties and routed
Both chasseur regiments now have 20% casualties and are effectively non combatant
Things are looking desperate for 3rd division and the French left flank

Vial (centre) holds the centre.
His artillery have again failed to inflict any casualties on the enemy

Maison (right) has also failed to inflict significant casualties
The Russian infantry are in skirmish combat with his gunners and their supporting infantry
He has ordered his cavalry to deploy on the hill to his left and his infantry in the centre

Russian corps at the end of Move 6

3rd Russian Corps
Wintzingerode has ordered his four divisions to engage the French

Rudzewitsch (left) is in contact with the Westphalians
His two leading infantry regiments skirmish with the gunners and supporting infantry
He is still on Engage orders, but has requested permission to Attack.

Woroncow (centre left) has advanced beyond Possneck
He has furthest to go to reach the French, and his guns are now masked

Melnikow (centre right) is trying to coordinate his attack with Galitzin
The two divisions are separated by the woods and communication is difficult

Galitzin (right) has won the initial cavalry melee, and routed the French chasseurs
The ground is now secure for the deployment of the remainder of 6th division

Game Notes
The four Russian divisions are on Engage orders
The infantry are allowed to exchange skirmish or musket fire with the enemy
However they are not allowed to press home their attack and melee
To do so the corps commander must first change their orders to Attack.

They are fortunate that the French gunners have proved particularly ineffective
Their infantry have reached combat range with only minor artillery casualties
Despite their initial lack of cavalry support they now have the advantage in this battle
With the arrival of 6th division they outnumber the French by four to three.

Rule 11 covers skirmish combat
Rule 12 covers musket firefight combat

Wargame rules can be found at

Thursday, July 19, 2012

Battle of Possneck Day 2 – Move 5


1200-1300  15th August 1813

Table at start of Move 5

The table has been extended to the left to include the river Saale
The river can only be crossed by the bridge
The Russian reinforcements will arrive top right behind the woods
If they can take the bridge the French will be forced to surrender

Left – French divisions have Hold orders and may not retreat until they are changed
Right – Russian corps commander have moved to the road top right to meet reinforcements

French corps at end of Move 5

2nd French Corps
Victor must wait his turn in order to issue orders to react to the arrival of 6th Russian division

Dubreton (left) has deployed his cavalry brigade to the left of the woods to delay 6th Russian division
His artillery fire on the approaching enemy infantry, but no casualties
He must wait for orders to withdraw his division to hold the bridge

Vial (centre) has finally deployed his division
His artillery fire on the approaching Russian infantry, again no casualties


Maison (right) orders his cavalry to move onto the hill on the right
He orders his infantry on the hill to rejoin the division
His artillery also fire on the enemy infantry, once more no casualties


  Russian corps at the end of Move 5

3rd Russian Corps
Wintzingerode orders 6th division to attack the enemy left flank and take the bridge

Rudzewitsch (left) moves his division towards the French
His artillery engage the enemy  infantry but again fail to inflict any casualties
His Cossack regiment has 20% casualties, and must be kept in reserve

Woroncow (centre left) division redeploy and continue to advance
The brigade in Possneck is ordered to join the main advance
The lack of cavalry support has left the infantry exposed to the French cavalry

Melnikow (centre right) moves his division forward to the far edge of the woods
His infantry have masked the gunners, who have joined the advance
Galitzin (right) orders his cavalry brigade to form line and advance to engage the French cavalry
His infantry and artillery are in a long line along the Domburg road (off table right)
They will not be able to enter until their cavalry have contained the French cavalry

Game Notes
Once more the artillery on both sides have proved ineffective

There is now a real danger that the French will be cut off from the bridge by the newly arrived 6th Russian division.  If this happens they will have to surrender.

Markers are drawn each move to determine sequence of movement.  It is unfortunate that the French corps commander was not drawn before 3rd and 14th division.   This meant that 3rd division could not begin to withdraw to secure the bridge.

The closer the Russians come to the French defensive line, the harder it will be for the French to withdraw.

Their best hope now is to be able to withdraw before the Russians get close enough to pin them.  Even with the arrival of 6th division cavalry brigade, the French still have sufficient cavalry to cover the withdrawal.

Wargame rules can be found at

Campaign Move 4


0800 to 1200 15 August  1813

Marshal Victor - Commander 2nd French Corps


Victor had not intended to fight a second day at Possneck

The battle with 3rd Russian corps on the previous day had ended in a draw, with a slight advantage to 2nd French corps.  It had been a mainly cavalry engagement, and the Russians had suffered more casualties than the French

During the evening Victor received unofficial reports of a French defeat at Domburg, and he decided to withdraw his corps to the west bank of the river Saale and await further orders from Napoleon.

At day break his corps formed up ready to retreat, with 14th division forming the rear guard.   However first light also brought a renewed Russian attack on Possneck.   Victor could have moved one division over the river, but the remaining two divisions would have had to face the three Russian divisions.

He decided to stand and fight between Possneck and the river.    The town delayed the Russian advance and the French were deployed before the battle began.

The morning went well for the French.   Most of their cavalry was at the head of the retreating divisions, and had to quickly move east to cover the deployment.  But once in position they delayed the Russian advance, as did the town itself.

However by late morning there were worrying reports of Russian cavalry approaching the French left flank from the direction of Domburg.   The French cavalry were too busy with 3rd Russian corps to investigate, and the terrain made it difficult for the infantry to determine what was approaching.  

Just before midday he orders his left hand division to send their cavalry to investigate.  Unfortunately 4th chasseur brigade had suffered the most casualties during the previous day’s fighting.   But they were the only cavalry available and would have to make do.

Victor began to ponder the difficulties of a fighting withdrawal across the river in the face of a reinforced Russian attack.   There were still eight hours of fighting before nightfall and his corps was already in contact with equal numbers of the enemy.   A flank attack with fresh Russian troops would be difficult to counter with very few reserves available to him.

Wednesday, July 18, 2012

Battle of Possneck Day 2 – Move 4


1100-1200  15th August 1813

Table at start of Move 4

Left – French cavalry have advanced to force the Russian cuirassiers to retire
Right – Russians have retired facing the French and still pose a threat to the infantry

French corps at end of Move 4

2nd French Corps
Victor receives reports of the approach of a large body of Russians on the Domburg road

Dubreton (left) sends his cavalry to the left of the woods to investigate reports of approaching enemy
His artillery open fire on the approaching Russian infantry but inflict no casualties

Vial (centre) is at last free of cuirassier threat
He orders his gunners back to the guns
Infantry form column of attack
Cavalry move to the front

Maison (right) orders his leading dragoon regiment to charge the Russian cuirassiers again
Once more the Russians fail their morale test to counter charge (roll total of 1)
The cuirassiers meet the charge at the halt, are routed and lose 10% more casualties
Artillery fire on approaching Russian infantry but cause no casualties

 Russian corps at the end of Move 4
 
3rd Russian Corps
Wintzingerode moves to the Domburg road to meet the reinforcements

Rudzewitsch (left) moves his division towards the French
His artillery engage the enemy  infantry but fail to cause any casualties

Woroncow (centre) division thrown into disorder by the routed cuirassiers
The garrison of Possneck pass their morale test for a routed friend within 4”
The gunners also pass their morale despite being routed thorough
Leading infantry form square to protect the disordered gunners

Melnikow (right) moves his division forward to make room for the reinforcements
He is waiting for his infantry to reach the far edge of the woods before moving to contact
His gunners limber their guns as they are now masked by the advancing infantry

Game Notes
Artillery require a total of 8 with 2D6 dice to achieve 10% casualties.
The Russian gunners have failed to “soften up” the enemy as their infantry advance
The French gunners have not done much better

When a regiment fails its morale and routs, all friendly regiments within 4” have to test their morale
When there are so many regiments with existing casualties this can have serious consequences.

The approaching reinforcements is 6th division of 2nd Russian corps
Neither commander was aware of this approach due to the difficult terrain
The leading regiment will arrive on the table at the start of the next move.

Rule 7 deals with artillery fire
Rule 18 deals with morale

Wargame rules can be found at
Monday, July 16, 2012

Battle of Possneck Day 2 – Move 3


1000-1100  15th August 1813

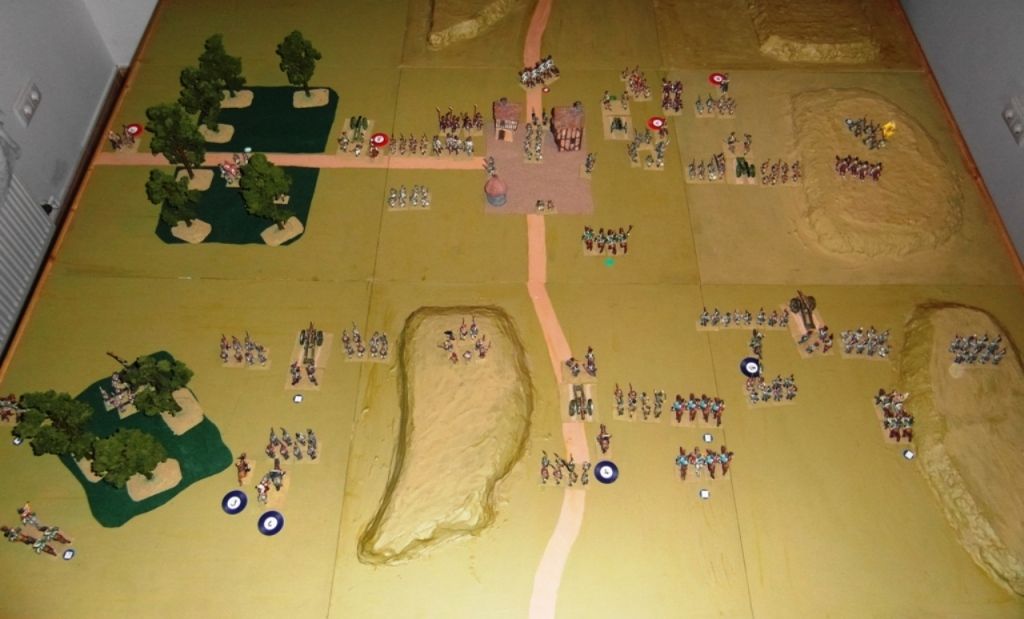
 Table at start of Move 3

Left – French centre in confusion due to Russian cuirassier charge
Right – Russians have advanced and have entered Possneck and the woods beyond

Russian corps at the end of Move 3

3rd Russian Corps
Wintzingerode does not issue any new orders

The heavier Russian artillery are now within range of the French and open fire
During this first round all miss due to consistently poor dice

Rudzewitsch (left) moves forward and his gunners manhandle the guns forward

Woroncow (centre) orders his cuirassier regiment to break contact and retire
They have been very lucky both during the opportunity charge and the subsequent cavalry melee

Melnikow (right) is finding it difficult to deploy in the narrow space between the town and the woods
It is proving difficult to coordinate the brigade moving through the woods and the rest of the division

French corps at end of Move 3

2nd French Corps
The French deployed is in a shambles due to the Russian cuirassier charge

Dubreton (left) is not affected by the chaos in the centre
He has deployed his division between the woods and the hill
He has kept his cavalry in reserve to shield them from enemy artillery

Vial (centre) is unable to advance or man his artillery
His hussar brigade have 10% casualties and are no match for the heavier Russian cavalry
He orders one infantry square forward to secure the guns until the enemy cavalry retire

Maison (right) orders his leading dragoon regiment to charge the Russian cuirassiers
The Russians fail their morale test to counter charge, and meet the dragoons at the halt
Due to a poor dice throw (total of 5 with 2D6) the melee is a draw, no casualties, both disordered
His division is in position, but unable to deploy until the cuirassiers withdraw

Game Notes
With both divisions on Engage orders, cavalry combats tend to be ineffective
The poor dice throw resulted in a draw with no casualties on either side
Fortunately the Russians withdrew during their turn rather than risk further casualties

The opening moves of this game have been dominated by the Russian cuirassiers
For a regiment which started the game with 10% casualties they have done well

The Russians must now take advantage of the French confusion to press home their attack
They have nine more moves, which is plenty of time, to do so
However the restricted ground area is making it difficult for them to deploy properly
And they can expect to receive artillery casualties as they approach the French.

Rule 7 deals with artillery fire
Rule 14 deals with cavalry combat

Wargame rules can be found at