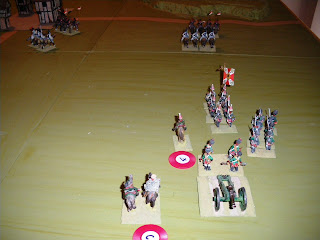
1200-1300 14 August 1813
Table at the start of move 1
Domburg is the town in the centre
7th French division is
approaching from the centre left
5th Russian division is
approaching from centre right
6th Russian division is approaching
from bottom right
French Right - 7th division
General
Morand (Average)
12
Command Points
Orders
– move to Domburg
Cavalry form line and move to right of
Domburg to protect deployment
Leading infantry regiment makes for the
town
Remainder of the division deploy to the
right of the town
Marshal
MacDonald (Poor)
3
Command Points
Orders Morand to hold the town and the road
to the right
General
Bistrom (Average)
11
Command Points
Orders
– Move to Domburg
Cavalry form line and move to right of town
Remainder of division march towards the
town in column of march
Leading infantry regiment forms column of
attack
Russian Left - 6th division
General
Gailitzin (Poor)
13
Command Points
Orders
– Move to Domburg
Cavalry form line and advance between
hamlet and town
Remainder of the division advance in column
of march
Artillery unlimber and leading infantry
regiment form square to protect the gunners
General
Sacken (Poor)
6
Command Points
Moves to meet 4th division and
orders Potemkin to advance to the hill north of the town
Russian Right - 4th division
General
Potemkin (Average)
12
Command Points
Orders
– Move to hill north of town
Cavalry form line and move towards hill
Remainder of division follows them in
column of march
French Left - 16th division
General
Fontanelli (Poor)
14
Command Points
Orders
– Move to Domburg
Cavalry form line and advance to left of
town
Remainder of the division follows in column
of march
Game
Notes
7th French division has moved
first and been able to take advantage of multiple moves.
These are allowed providing there is no
enemy within 16”
Rule 5 covers movement
The Russian divisions all come within 16”
of the enemy after their first move, and this has slowed their deployment down
All divisions are moving in column of march
as this allows a longer move distance, but they cannot fight in this formation
and will have to deploy before they come within charge range of the enemy
cavalry
All of the cavalry brigades have formed
line before they advance. Otherwise
they would be vulnerable to an opportunity charge by enemy cavalry in line
Rule 6 explains opportunity charges.
Wargame rules can be found at


No comments:
Post a Comment