1500-1600 15th August 1813

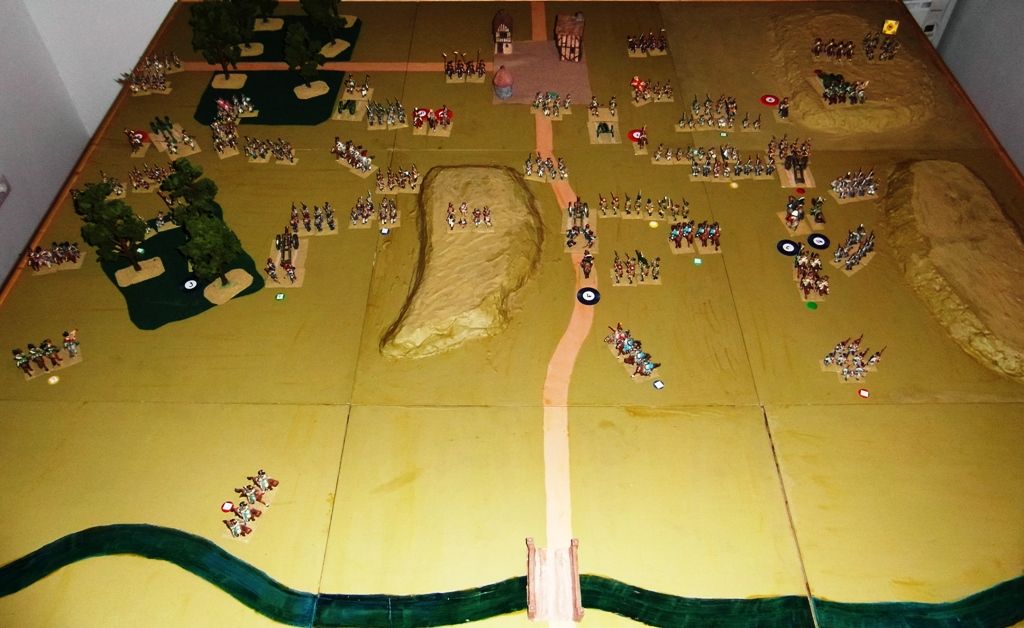
Table at start of Move 8
The battle is now entering the critical
phase
Both corps are within close combat range

Russian
corps at the end of Move 8
3rd
Russian Corps
Wintzingerode moves to change division
orders from Engage to Attack
Rudzewitsch (left) now on Attack orders
His grenadier regiment charge home on the
French gunners and cut them down
Major setback on the hills to his left
His artillery is charged by the French
dragoons and cut down
Supporting infantry and cavalry both shaken
Woroncow (centre left) is still on Engage
orders
His artillery have moved forward to close
range, and cause damage to the French infantry
2nd infantry exchange volley
fire with 5th Westphalians, both lose 10% but neither give way
Melnikow (centre right) orders changed from
Engage to Attack
He orders his shaken infantry to withdraw
to make room for the cavalry reserve
4th cuirassiers move forward and
prepare to charge French infantry
Galitzin (right) still on Engage orders
His cavalry receive ineffective skirmish
fire from the woods as they push towards the bridge
His two leading infantry regiments advance
to woods and skirmish with French infantry
French receive 10% casualties and retire
from edge of woods shaken
French corps at end of Move 8
2nd
French Corps
Victor orders his divisions to attempt a
fighting withdrawal to the river
Dubreton (left) orders his artillery, and
his isolated infantry on the hill, to fall back to the bridge
The remainder of his infantry continue to
skirmish, but are losing the combat
In desperation he orders 6th
chasseurs (with 20% casualties) to charge the Russian dragoons
The chasseurs fight well, but are forced to
withdraw Shaken
There are now no formed cavalry to prevent
the Russians taking the bridge
Vial (centre) has received orders to
withdraw to the river and hold the bridge
He is under attack, and can only send 16th
hussars to hold the bridge
His artillery fire one last round on the
Russians and then limber to retreat
The Russians receive casualties but
continue to advance
One shaken infantry regiment, and the
disordered 11th hussars, are left to cover the retreat
Maison (right) is making a determined stand
7th dragoons test for
opportunity charge on Russian artillery as they attempt to deploy on opposite
hill
Dragoons charge, Russians fail test to
react, gunners are cut down
Supporting Russian infantry and cavalry
both fail morale test and are Shaken
His gunners are overrun and cut down by
Russian grenadier regiment
5th infantry are within 4”, lose
their morale test and are shaken
Despite his success with 7th
dragoons his position is now desperate
He has lost his artillery and one of his
infantry regiments in rout, a second is shaken
Game
Notes
Both corps are now losing serious
casualties, resulting in loss of morale
Up to one third of each division is cut
down, in rout, shaken or disordered
No CPs are allowed for these regiments
Divisional commanders must decide where
best to use the reduced CPs
The combat options when on Engage or Attack
are very different
Engage allows infantry to skirmish or
volley, but not to melee
Attack orders allow infantry to charge and
melee, both infantry and gunners
On Attack orders combat tends to be much
more decisive
Rule 3 covers Command Points (CP)
Rule 4 covers divisional orders
Wargame rules can be found at
No comments:
Post a Comment